Showing posts with label Cuttlebug. Show all posts

Thursday, May 25, 2017

DT Day with Connie's Crafty Cart

Today is my day to post over at Connie Can Crop.

 
The papers and, "Thank You" I used all came from:


The card folds at the top.

Card base measures: 5" wide x 5.5" tall.
The yellow layer was embossed with my Cuttlebug. The circle and scalloped circle are Spellbinder's dies. The ribbon and pearls are from my stash.

Please come and join in the fun with this month's challenge:


Wednesday, May 18, 2016

Blue on Blue Birthday

Recently I have really had an itch to actually use my favorite color to create something and this is what I came up with.


I started with a blue card base then I embossed a piece of vellum with a Cuttlebug folder which I received as a gift from Dawn at Designs by Dragonfly. After embossing I used a StazOn ink pad, I ran it over the embossing to give the vellum a little color.

I have been unable to find a vellum adhesive that is actually hidden so I used a few glue dots and covered them with the pearls.

The sentiment panel was cut with a die that has been in my stash forever, sentiment is wet embossed and backed with a lighter blue, adhered to the vellum with foam pads then I added a bow and chomped my corners.

I am entering this card into these challenges:
Dies R Us - #49 - Birthday
Just Us Girls - #343 - Trend Week - Vellum
Tic-Tac-Toe Challenge - #10

I went with the bottom row: Bow, Texture, Vellum.


Friday, May 22, 2015

My Arizona Garden with Ewe-N-Me Printables

Back in Michigan I always had some type of garden, but here in NW Arizona the soil is sand and the ground is hard, our backyard is not user friendly, it's a long steep walk on a gravel covered path down to the bottom. Gardening here would take raised beds and more room than our current back yard offers so this is my Arizona Garden.  
 
I started with this beautiful collage sheet. You get 9 different seed envelopes and you can print them as many times as you need to.
 

I printed the file onto glossy photo paper then I backed it with a piece of chipboard and cut them out using my paper trimmer. Then I glued wooden sticks onto the backs of the images.

Using an old seed starter set up I had on hand I put a few coats of Mod Podge on the wooden crate and painted the pots off white.

 
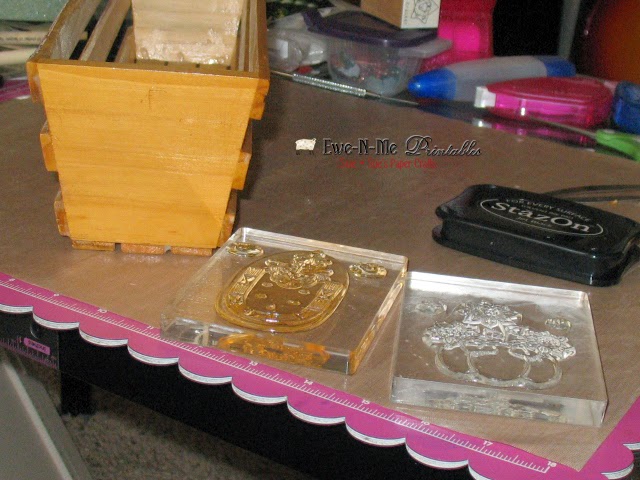
When the Mod Podge dried I stamped images on the ends of the crate with StazOn ink and colored them with markers.


I didn't have anything on hand to fill the pots with so I went out into the yard and collected some of our landscaping rocks. Then I went to town decorating the front of the crate using, buttons, brads (I took off the prongs on the backs and attached them with my hot glue gun) and butterflies I cut and embossed with my Cuttlebug using some of the beautiful papers my kids have sent me from Japan.


Stamps are from: http://plumpurdy.com/
Flower buttons from: Melissa Frances 


Tuesday, May 12, 2015

Blog Quick Qoutes - Challenge #51

This month's Blog Quick Quotes Challenge is to add a flower or butterfly to your project. I decided on butterflies.

 
Quick Quotes Products used:
 
All papers are from Penny's Playground:
 
 
Stripped paper - QQP - PP400
Blue under butterflies - QQP - PP200 (flip side)
Polka Dots - QQP - PP100
 
Other Products used:
 
5 x 7 white card base
Purple Gingham ribbon
Jewel flower
Sequins
Sentiment
Vellum
Foam pads
Cuttlebug - Butterfly die and embossing folders


Entering into this challenge: Blog Quick Quotes - Challenge 51
 

Saturday, April 25, 2015

HIMCR #197 - Any Holiday

HIMCR #197 - Any Holiday!

The sponsor is The Paper Shelter!

 
The giveaway is 2 digital images, winner's choice, from The Paper Shelter!


Mother's Day is on it's way and I have more cards than I can use for the occasion including this cutie.


The image is from The Paper Shelter, you can get it colored or uncolored. I choose the colored one.
 
The embossed background was done using the Cuttlebug, "Thank You" All in One set. This is something that Provo Craft put out a few years ago but I never used it because when I purchased it I was unaware that I also needed the folder, which is yet another product. I finally got the folder and I really liked the way the embossing plate went with the image.
 
 
I used a piece of teal Core'dinations paper for the embossing then I did a light sanding on the raised areas. I have found that using a piece of sandpaper works better than any of the gadgets on the market.
 
I added a piece of yellow ribbon to the bottom of the embossed piece and layered it onto a piece of yellow Core'dinations paper (thank you Renee).
 
The sentiment is a stamp from my stash, I used a teal ink and stamped it onto a piece of vellum which I mounted onto a scrap of the yellow I used for the card.
 
I mounted the image on to an Action Wobble just for fun.


Saturday, March 14, 2015

HIMCR #191 - Super Scraps Saturday

HIMCR #191 - Super Scraps Saturday!
 
Just use Scraps!

The sponsor is Shop Pumpkin Spice!
 
The giveaway is ??????


I made this card for my son's upcoming birthday.
 
Recipe:
Bazzill Basics from Shop Pumpkin Spice
Printed cardstock (mine came from the above mentioned son)
Imaginisce jewel setter and jewels from Shop Pumpkin Spice
Ribbon from my stash
Spellbinder's scalloped circle dies
Sentiment was cut with my Cuttlebug and a Cuttlebug die
 
I wanted to, "Happy Birthday" in Japanese on it but my printer died so I used the ribbon and die cut sentiment.
 

Saturday, February 14, 2015

HIMCR #187 - Super Scraps Saturday

HIMCR #187 - Super Scraps Saturday! And Blog Hop!!!


Just use Scraps and image from Little Miss Muffet Stamps!
The sponsor is Little Miss Muffet Stamps!

 
The giveaway is $6 Gift Certificate to Little Miss Muffet Stamps!


This week I tried a new technique, using acrylic paint with my embossing folder that I found here: YouTube  I watched this video a couple of times then sat down to give it a try myself. She suggests using watercolor paper, I don't have any so I went with plain cardstock. I found that I was adding either too much water to the paint or putting it on the folder too thick, it took a few tries to get it right. The less busy the folder is, the better your results.

 
Recipe:
 
Image from Little Miss Muffet Stamps
Cardstock
Colored pencils
Acrylic paints
Ribbon (my ribbon came from my Create and Craft TV blog hop prize, the ribbons were wrapped around my prizes)
Embossing folders (Cuttlebug Argyle, Darice Flower Frenzy and eBosser Delicate Dots)
Action Wobble
Chipboard
 
I used up 4 scraps this week, I need to use a up a whole lot more, they are taking over my craft room.
 
I colored my image with my colored pencils then sat down with my paints and Darice Flower Frenzy embossing folder. I painted the folder and inserted my white cardstock, pressing the paint onto the paper.
 
I used my Cuttlebug Argyle folder on the pink paper and the eBosser Delicate Dots folder on the blue card base.
 
I backed my image with a piece of chipboard (old Ritz cracker box) and added an Action Wobble to it.
 
No sentiment yet because I haven't decided what to use it for.
 
Here are all of the stops along the hop:
 
Kathy Up In the night with Kat. http://www.upinthenightwithkat.blogspot.com/
Sue’s Paper Crafts http://suek86401.blogspot.com/ - YOU ARE HERE
Designs By Sammy http://designsbysamm...y.blogspot.com/
LJ Creations http://www.ljcreation.blogspot.com/
Jenscrapstoo http://jenscrapstoo.blogspot.com/
Laura   http://laurascreativeworld.blogspot.ca/


Saturday, February 7, 2015

HIMCR #186 - Wild Wasabi

For my Ewe-N-Me Blog Hop post, please click here
HIMCR #186 - Wild Blushing Rose!

Wild Wasabi, Blushing Bride, and Red Rose!

These are Stampin Up colors but please feel free to use an brand of matching colors.

The sponsor is My Besties!


The giveaway is all four images My Besties used by the HIMCR Design Team! 

 
This week we have had some fun colors to play with: wild wasabi, blushing bride and rose red.

 
Recipe:
 
My Besties image
Cardstock
Bazzill Basics
Rick Rack
Colored Pencils, Chalk, Markers whatever you like to color with
Glitter, Flocking
Glossy Accents
Foam Pads
Corner Rounder
Cuttlebug Alphabet Dies
Spellbinder's Scalloped Circles Dies
 
I used colored pencils and chalk to color my image. I used some Glossy Accents and flocking on the sleeves, Glossy Accents and glitter on the heard. I added a sequin and a pearl on her pants.

The card base and sentiment are cut from Bazzill Basics, I cut the sentiment with a set of Cuttlebug Alphabet Dies and adhered it to the card with foam squares.

I wrapped a piece of rick rack around near the bottom then added a piece of the paper from the kids in Tokyo after cutting it out with the biggest die in the package. I adhered to the card with foam squares, I also used the foam squares to attach the image to the paper.

Thursday, February 5, 2015

Angel Love Tags - Ewe-N-Me Printables Blog Hop

Welcome To The
Ewe-N-Me Printables Valentine Blog Hop


Deena made this cute file for me to work with:
 
Angel Love Tags: you get 6 tags total, 3 each of 2 different sizes. I used the larger size for my Valentine card.
 
 
I cut out the tag and inked the edges with black StazOn ink, I also cut a background layer for it and also inked that edge. I punched a hole in the top and added my twine.
 
For the background I made a mask and sprayed it with a peach Tombow marker and my eBrush.
 
I added a piece of washi tape to the bottom (my kids in Tokyo sent it to me). I cut the peach heart with my Cuttlebug and Sizzix Primitive Hearts #2. The bling is from Zva Creative. The tag is attached with foam squares.

This hop will run for three days Feb. 6th, 7th and 8th, 2015
(free files will be available on Feb. 9th)

Visit each Design Team Member's blog
and check out our exclusive Valentine designs:

If you follow each blog and leave a comment on each blog you'll get all the printables used in the hop for FREE!

HOP GUIDELINES
1. FOLLOW all four blogs in this hop. You can follow by using Google Friend Connect, Blog Lovin, email, etc. (Each blog has different options.)

2. COMMENT on all four stops and let each designer know what you think of their project.

3. SUBMIT your info on the last stop of the hop (
www.ewenmeprintables.blogspot.com) to let us know that you've followed the rules. Once the form* is received, we'll send you the links to the free printables used in the hop. The download links will be sent when the hop is over. (Feb. 9, 2015)

*Filling out the form is NOT a guarantee of files... please be patient while we verify your info.

 
I also have a giveaway going, two of my homemade masks/stencils, with Valentine's Day being right around the corner I am giving away 2 of my heart designs:
 
 
Hearts - 1
Each mask measures approximately 6 1/2" x 6 1/2", the hearts measure approximately 3/8".

Hearts - 2
The hearts on this mask measure approximately 5/8", 1/2" and 3/8". These are many other designs are on sale on my blog for $4.00 each.
 
Due to the cost of shipping, I can only ship to the US and Canada for this giveaway.
 
To win this giveaway you must be a follower of my blog and leave a comment below. 
 
Thank you for stopping by.
 
Sue


Wednesday, January 21, 2015

Sketch N Scrap #72

I haven't had much time to enter any challenges lately but when I saw this sketch over at Sketch N Scrap I decided that I would make the time and use the pictures that I took of our New Year's snow storm.
 
 
I really love the double page layouts and I had plenty of pictures to use. I had a hard time deciding which one to use.
 
 
The top picture is our front porch, on the bottom we have our view out the back, can't see much of the view due to the very, very low clouds that day. The last picture is looking down our street, completely snow covered.

 
Top picture is the sunrise over the mountains out back on New Year's Day, on the bottom is another view out the back and the icicles that formed on our bamboo shade that we use during the summer.
 
Recipe:
Cardstock
Vellum,
eBrush
Spectrum Noir markers
Cuttlebug snow embossing folder
Snowflakes
Snowflake brads (I cut the prongs off and adhered with Glossy Accents)
Imaginisce jewel setting tool and jewels
Close to My Heart Assorted Edges stamp set
Ink
Ribbon
 
After running the vellum through my Cuttlebug I sprayed it with Spectrum Noir marker #TB3 using my eBrush
I also used a mask, eBrush and Spectrum Noir marker #IG2 to add a little color to the title and subtitle.
I did my best to follow the sketch to the letter but also did a few little changes to it.
I used Cricut's Southwest Font for my title and subtitle.
 
Entering into this challenge:


Saturday, January 3, 2015

HIMCR #181 - Use Pinks


HIMCR #181 - Pinks!
Just use some pinks

 
The sponsor is Hiding in My Craft Room!

hidinginmycraftroom.com

The giveaway is TBA!
 
 
I ran into this design online last week and decided to give this Vertical Step Card and decided to give it a try.

 
Recipe:
 
 The base directions and template are at the end of this post. After I cut the card base and made my steps, I cut the letters with my Cuttlebug as well as the stars, cake and vellum envelope.
The flowers are from Queen and Co., I picked them up at the 2012 Great Lakes Mega Meet, I added a center with my green Stickles. I did make a mistake with the layering and rick rack, I should have layered the papers and added the rick rack before adding to the card base.
I also added some green and white Stickles to the cake.
The pink bling swirl is from Zva Creative.
The butterflies are from Melissa Francis (from the same Mega Meet), I used my green TomBow marker and eBrush to color them.
 
These directions are from a non English speaking blog, the translation is from Google.


Saturday, November 8, 2014

Miki's Birthday Card

My beautiful Daughter-In-Law is having a birthday and she loves butterflies.


I used my Craftwell Whimsical Wishes embossing folder and did some paper piecing for her dress. I also added a, "belt" to the dress and some jewels/pearls to the sky.


I cut the butterflies with my Cuttlebug butterfly die and embossed them using the matching embossing folders. I made some extra butterflies so that when Miki opens the card the loose butterflies will fall out. I added jewels/pearls to the middle and folded the wings up.
The dress and butterflies are all cut from some of the beautiful Japanese papers the kids have sent/brought me over the years.


Sunday, November 2, 2014

WOW!!! What a wonderful suprise

A few days ago I opened up my mailbox and there was a very fat envelope for me, it contained these wonderful goodies from my friend Dawn from: Designs by Dragonfly

Super cute card, Juli's Garden Cuttlebug folder, StazOn black ink pad and refill.

I was so surprised, what an awesome unexpected gift.
 
To show her how much I appreciated her gift, I used it to make her this card:


I used the embossing folder and ink to create this card, I added some glazed dimensions for the flower centers, the black flower and dotted strip were inked with the StazOn black and I stamped them on clear acetate. I used a pink card base, I cut the hole for the flower with my Cricut. Added a piece of pink and black checked ribbon on the side and the sentiment is from Paper Smooches Calorie Free stamp set. The polka dot background on was stamped with my Creative Time Build a Banner Kit, layered onto a piece of black cardstock.