Showing posts with label Japanese craft paper. Show all posts

Thursday, March 23, 2017

DT Day with Miss Kate's Cutables

It is my day to show off what I have created with a file from this month's sponsor, Miss Kate's Cutables.


I used the Forever Yours file to create this layout of my son's U.S. wedding (they had 2 ceremonies, one in his hometown in Michigan, one in her hometown in Japan) here is the happy couple.


This is a 12 x 12 layout, I printed the picture to be 5 x 7. I didn't resize any of the elements, I just cut them out without editing them in any way. I added some bling just because I love bling and like the way it looked. It is hard to see the tiny flowers on the paper I used to cut the flowers out of but I used paper the kids had brought me from Japan. The colors I used for this layout were colors that Miki had requested for the wedding decorations, flowers, etc.
 
Please come and join in the fun over at Connie Can Crop  this month and play along with our Sketch Challenge using this sketch:


Sunday, January 22, 2017

Paper Crafting - Challenge - Week - 168

I found another challenge to play along with :papercrafting-challenge-week-168. When I checked out their new challenge at the beginning of the week I wanted to take part but it took me all week to come up with the prefect idea.

My son and wonderful daughter in law live in Tokyo, Japan. They had these postcards made up to ring in the New Year which is actually the Year of the Rooster but the kids have dubbed it, "the year of the fried chicken". They had this caricature made and it looks SO much like the two of them.
Here is a picture taken at their Japanese wedding so that you can see the real them. They are entertaining their guests with a song and dance routine.

 
This is the inspiration photo. I just love the beautiful colors and I wanted to use some of the Japanese crafting papers the kids have brought or sent me over the years.


The background paper is very thin so I adhered it to a piece of chipboard to give it some strength.

I scanned the postcard and printed it as a 5 x 7. I added some red ribbon to the top and bottom of the picture then attached the picture to a piece of yellow cardstock that I had embossed with a Honeycomb folder. I cut the letters with my Cricut and their Robotz cartridge.

The background paper and the little Japanese figures are all gifts from my kids.

I am entering this layout into this challenge:
Papercrafting-challenge-week-168

Friday, January 13, 2017

What a Bunch of Characters!!


Welcome to the 
What a Bunch of Characters Blog Hop
Thank you for joining us for a super magical blog hop themed all around Mickey Mouse and his friends at the Magic Kingdom! These talented crafters have created all sorts of projects to inspire you and share the fun of Disney's lovable Characters!

 You should have arrived from Kim's Blog  If you just happened upon this spectacular hop, Connie Can Crop is the first stop in this hop. 

This is a one day blog hop, but you have until Sunday to finish hopping and leaving your comments for all of these amazing crafters.


We have an awesome BRAND NEW sponsor for this month!


One lucky winner will win their choice of a digital stamp from their shop!!
Be sure to visit them on etsy here.
On facebook here.
And their blog here.
 

What do you need to do to win? Easy... become  a follower of each of the fabulous blogs in this hop and leave each of them a comment letting them know what you like best about their projects.

You will have until 10 pm Sunday to finish the hop and leave your comments.
Winners will be announced on Wednesday 1/18/17
at Connie Can Crop.
Be sure to follow everyone and leave a comment along the way!
When my son and his now wife were dating they made a visit to Tokyo Disney Sea. I decided to scrap a few of those pictures for this hop.


Minnie & Mickey in the center, David riding on the tram on left, David and Miki with I don't know who (I should know but I'm drawing a total blank).

Recipe:
2 heart doilies from my stash
"Tokyo" and "Sea" cut from Cricut's Art Nouveau cartridge, @ 1.3"
"Disney Heart" cut from Cricut's Mickey and Friends cartridge @ 2"
"Mickey Ears" cut from Mickey and Friends @ 2", the paper I used on the top layer is a piece of Japanese craft paper from the kids
A few jewels from my stash.


 Up next is The Amazing Alicia
Here's our line up in case you get lost:

Lisa- http://lisaslittlerascals.blogspot.com/
Sarah-  http://sarahbiswabic.blogspot.com/


Don't forget to check out this month's new challenge!!


Connie Can Crop Challenge #54
due 11:59 P.M. Tuesday, January 31, 2017
Pacific Time
 

Tuesday, September 27, 2016

Happy 5th US Anniversary

My son and his wonderful wife will be celebrating their 5th US Anniversary at the end of October. The beginning of December they will be celebrating their 5th Japanese Anniversary. This card is for their US Anniversary, I'll make another card for their Japanese Anniversary.


The card base is Bazzill Basics.
The blue strip is some Japanese paper the kids brought me on one of their visits. I embossed it with my Cuttlebug but the embossing is kind of hard to see in the pictures.
I cut the 5 with my Cricut and Tie the Knot Cartridge.
The jewels are from my stash.


Friday, April 22, 2016

Note cards with a Japanese Flair and Tri-Fold Card

I have more flowers for you today as well as some Japanese papers my son and his beautiful wife brought me from Japan. I was able to play with this cute file this week which you can find here: Ewe-N-Me Printables


You get 2 different size tags and 3 different designs for a total of 6 tags per sheet and you can print as many as you want to.
 
I really liked the colors on these tags and I thought that they looked great with some of my Japanese crafting papers. I used the 3 small tags for these cards. I also added a little bit of twine to the fold side and a few jewels and my note cards were finished.
 
 
I made a tri-fold card using the 3 large images.
 
 
I added some flowers to the inside and you can't tell from the pictures but I also added jewels to the flower centers.
 
Thank you for stopping by and taking a look.
 
Sue
 

Friday, May 22, 2015

My Arizona Garden with Ewe-N-Me Printables

Back in Michigan I always had some type of garden, but here in NW Arizona the soil is sand and the ground is hard, our backyard is not user friendly, it's a long steep walk on a gravel covered path down to the bottom. Gardening here would take raised beds and more room than our current back yard offers so this is my Arizona Garden.  
 
I started with this beautiful collage sheet. You get 9 different seed envelopes and you can print them as many times as you need to.
 

I printed the file onto glossy photo paper then I backed it with a piece of chipboard and cut them out using my paper trimmer. Then I glued wooden sticks onto the backs of the images.

Using an old seed starter set up I had on hand I put a few coats of Mod Podge on the wooden crate and painted the pots off white.

 
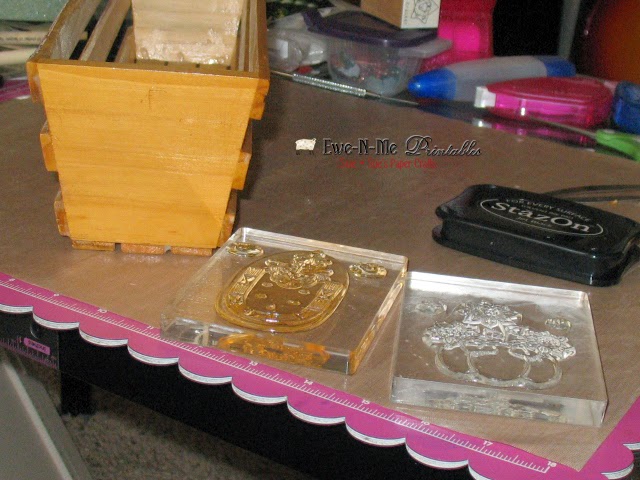
When the Mod Podge dried I stamped images on the ends of the crate with StazOn ink and colored them with markers.


I didn't have anything on hand to fill the pots with so I went out into the yard and collected some of our landscaping rocks. Then I went to town decorating the front of the crate using, buttons, brads (I took off the prongs on the backs and attached them with my hot glue gun) and butterflies I cut and embossed with my Cuttlebug using some of the beautiful papers my kids have sent me from Japan.


Stamps are from: http://plumpurdy.com/
Flower buttons from: Melissa Frances 


Saturday, January 24, 2015

HIMCR #184 - Any Holiday

HIMCR #184 - Any Holiday!
 
This year we've decided to change our weekly challenge line up. This year every fourth week is going to be Any Holiday! Perfect for those of us that need to work on Christmas cards through out the year or perfect for those of us that need to scrapbook old pictures from ANY HOLIDAY!!!

The sponsor is A Day for Daisies!

The giveaway is a $12 Gift Certificate to A Day for Daisies!


I made 2 cards this week, I used some of my Japanese crafting supplies that my kids in Tokyo sent me.

 
I added the background hearts to my paper via my eBrush and a heart stencil that I made.
The papers behind the cupcake images are crafting papers from Japan. The ribbons and butterflies are from my stash, I colored the wooden butterflies with my eBrush. I used my Spellbinders scalloped circle dies to cut the circles, I used the biggest die on the solid papers, the next size down for the Japanese papers. I also added an Action Wobble to the, "Love Tart" because Miki loves the way they wobble.


 After I colored the images I used some Fantastic Glaze & Glue to add a little dimension to the, "frosting" and sprinkled the pink one with pink Tinsel Glitter and white glitter on the blue one. The pinkish color on the blue one is from an attempt to just color the, "frosting" but I didn't like the result.


Here are the insides, the washi tape is from Japan, the sentiment and heart stamps are from my stash.
 

Saturday, November 8, 2014

Miki's Birthday Card

My beautiful Daughter-In-Law is having a birthday and she loves butterflies.


I used my Craftwell Whimsical Wishes embossing folder and did some paper piecing for her dress. I also added a, "belt" to the dress and some jewels/pearls to the sky.


I cut the butterflies with my Cuttlebug butterfly die and embossed them using the matching embossing folders. I made some extra butterflies so that when Miki opens the card the loose butterflies will fall out. I added jewels/pearls to the middle and folded the wings up.
The dress and butterflies are all cut from some of the beautiful Japanese papers the kids have sent/brought me over the years.