Showing posts with label Easter. Show all posts

Friday, April 7, 2017

Hippity Hop Blog Hop


Welcome to the ...
 Hippity Hoppity Blog Hop
Here comes Peter Cottontail
Hoppin' down the bunny trail
Hippity hoppity, Easter's on its way!
Thanks for joining us for a fun hop full of Easter Bunny
inspired projects!!
Wishing you all a blessed Easter with your family and friends!!
You should have arrived from
 
 
 If you just happened upon this spectacular hop, Connie Can Crop is the first stop in this hop.
This is a one day blog hop, but you have until Sunday to finish hopping and leaving your comments for all of these amazing crafters.
We have an awesome sponsor for this month!


One lucky winner will get a $20 gift certificate to shop Paper Crafting World!
Be sure to check out their shop online Here
Visit them on facebook HERE
Follow their blog http://papercraftingworld.blogspot.com/ for freebies and inspiration!
What do you need to do to win? Easy... become a follower of each of the fabulous blogs in this hop and leave each of them a comment letting them know what you like best about their projects.
You will have until 10 pm Sunday to finish the hop and leave your comments.
Winners will be announced on Wednesday 4/12/17
at Connie Can Crop.
Be sure to follow everyone and leave a comment along the way!

 I found this card in the Silhouette store.
 
The card measures 6.25" x 5" tall and folds fairly flat for mailing.


 I used Kraft paper for the card base and some scraps of yellow, blue and white for the Easter egg, sentiment and layers under the egg. I added some blue jewels to the edges.

The, "happy Easter" is a Cricut cut from the Easter 2010 cartridge.

The card base measures 6.25" wide x 5.5" tall and folds flat for mailing.

Here's our amazing line up in case you get lost:
 
Please stop by and check out this month's challenge over at Connie Can Crop


due 11:59 P.M., Sunday, April 30th, 2017
Pacific Time

Friday, March 17, 2017

Anything Goes #180

It is time for a new challenge over at Jo's Scrap Shack. This week's sponsor is Digital Designs by Loby Loo.


I decided to make an Easter card.


I used chalks to color my image, used Bazzill Basics paper for the card base and a scrap of green.

Please come over to Jo's Scrap Shack and join in the fun.


What do you need to do to enter?
Challenge Rules

1. Please post a direct link to your blog post that includes your challenge entry project, using the linky tool below. 

2. Be sure to include a link back to Jo's Scrap Shack and to the challenge post you are entering your project into

3. THREE entries per person are allowed for each challenge and you must post a separate blog post for each entry.

4. For all entries -NO BACK LINKS ACCEPTED- 
The date on your blog post should be dated between the start date & the end date for the challenge you are entering, in order to be eligible for the challenge & prizes

5. You may link up to other challenges but be sure to link back to Jo's Scrap Shack and to the challenge post you are entering 

 * All entries that do not meet the challenge requirements
WILL NOT be eligible for the top 3, any sponsor wins or any random wins by Jo
All random wins will only be mailed within the US and Canada only.

You have until March 24 by 6:00PM (eastern, USA) time to link up.
All winners will be announced during the week of March 27th.
Have fun and we look forward to seeing what you create!
 

Friday, March 25, 2016

Easter Bunnies Collage Sheet


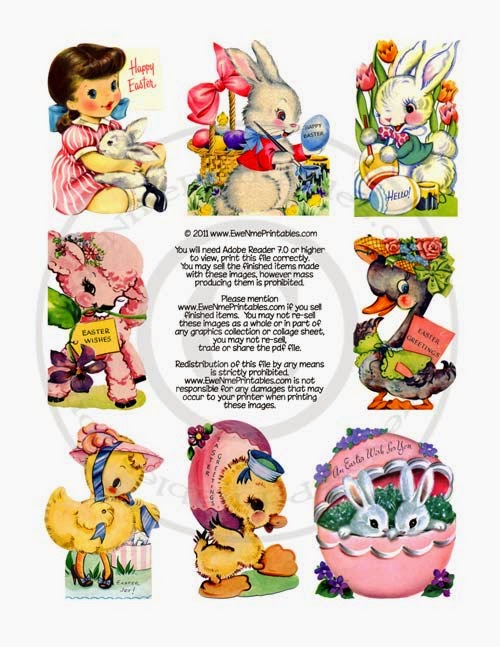
Easter is right around the corner so I have been busy getting my cards ready to mail. The 4 cards that I have for you today are all from this darling collage sheet: Ewe-N-Me Printables.
 
There are 19 total different images per sheet and you can print as many sheets as you need. This sheet is really nice to use if you want to make all of your cards different. 


Two bunnies in love, isn't it a sweet image? A little washi tape, a few sequins, a little twine and computer generated sentiment and your card is complete.

 
I think this is my favorite image from the sheet, I added a doily, washi tape, Imaginisce jewels, sequins and a computer generated sentiment.
 

All of these cards were very fast and easy to make, the film strip style images were perfect for my film strip die.

I was able to use up some scraps on the sentiments and the film strip die cuts.
 

Friday, March 18, 2016

Easter Card In A Box

Evidently I have been on a bit of a, "card in a box" binge, this is the 3rd one I've made recently. But when I saw this beautiful collage sheet I decided that it was perfect for a card in a box. Aren't these angels beautiful?
 
 
You can find the file here: Ewe-N-Me Printiables.  You get 2 sizes of 6 different images for a total of 12 images per sheet and you can print as many as you need.
 

After cutting out and choosing my images, I used 3 large images on the bottom of the box and 3 small images on the top of the box,  I went to work on measuring, cutting, scoring and folding my box. I put my images onto the box before I assembled it because it is easier that way.


I used my Cricut to cut the, "Happy Easter" and the flowers with the Easter 2010 cartridge. I added some jewels to the flower centers and a couple around the upper portion of my card.
 
If you haven't made a card in a box before, here is a very good tutorial: Card in a box tutorial.


Friday, March 27, 2015

Easter Cards

Easter is right around the corner and Deena has several Easter Printables to choose from. I really like this collage sheet featuring vintage Easter images.    
 
You get 5 total images, two 4" squares and three 3" egg shapes.
 

I made two different card designs:


For my first card I used Kraft paper for the card base and added a pink background with an Easter ribbon, a few Imaginisce jewels and I was finished with card 1.
 
 
For the second card I added a border stamp from Close to My Heart, sentiment stamp from my stash and a few sequins along with the background paper and ribbon.


The third card is an accordion fold, I used the 3 egg shaped images after starting with a cream card base that I added a touch of color to with my eBrush. I used some scraps to make the layer under the images and I embossed them with my eBosser and Swirltangle folder.
 
The butterflies are some brads from my stash that I cut the backs off of and glued them to the card. I also used a couple of decorative buttons and a bow made with a Couture die set which I won from Create and Craft TV, a few sequins and sentiment which is printed on vellum. I inked all of the edges.
 
Deena's Printable files are so easy to use, just print cut and design, they make the, "work" go very fast so you still have plenty of time to get a few cards made and mailed.


Friday, March 20, 2015

Retro Valentine Cards

This week I had the pleasure to work with this darling Easter Cutout Printable.


You get 8 different images on the sheet. I decided that some accordion cards would be a great way to use them.
 
 
These are quick and easy to make and it didn't take very long to make them.
 
 
Both of the cards measure 4" tall x 12" across, I scored them every 3 inches giving me 4 folds to work with.
 
After printing out the file, I adhered the entire sheet to a piece of very thin chipboard then cut out each image and inked the edges.
 
The printed layers behind the images all measure 3 1/2" tall x 2 1/2" wide except for the first and last panels on the second card, those are 3 1/4" tall x 2 3/4" wide.
 
 
On the first card I added a sequin topped by a pearl on each corner and a Melissa Frances wooden butterfly sprayed with my eBrush. The second card has a jewel in each corner and a purple butterfly that I added a few pearls to.
 
I eBrushed some white cardstock with pink and purple Spectrum Noir markers for the second card.
 
You can tie them closed with just about anything, ribbon, twine, etc. I used some fluffy string that I have had for several years.
 
Thank you for stopping by to take a look.


Sunday, March 1, 2015

HIMCR #189 - Any Holiday


HIMCR #189 - Any Holiday!

The sponsor is Sami Stamps


The giveaway is $12 gift certificate to Sami Stamps!


Recipe:
Image from Sami Stamps
Cardstock - Green stripped from DCWV Spring Stack, blue from Bazzill Basics
Colored pencils
Alpaca yarn
Sentiment stamp
 
Print and color image, I cut the Bazzill Basics to be a 1/2" bigger than the image on all sides, the stripped card base measures 6" x 6". I tied a piece of alpaca yarn on the folded side. I inked the edges of my image and the Bazzill Basics.
Stamp sentiment, ink edges and adhere to a piece of coordinating paper, cut out and ink edges, adhere to card with foam pads.