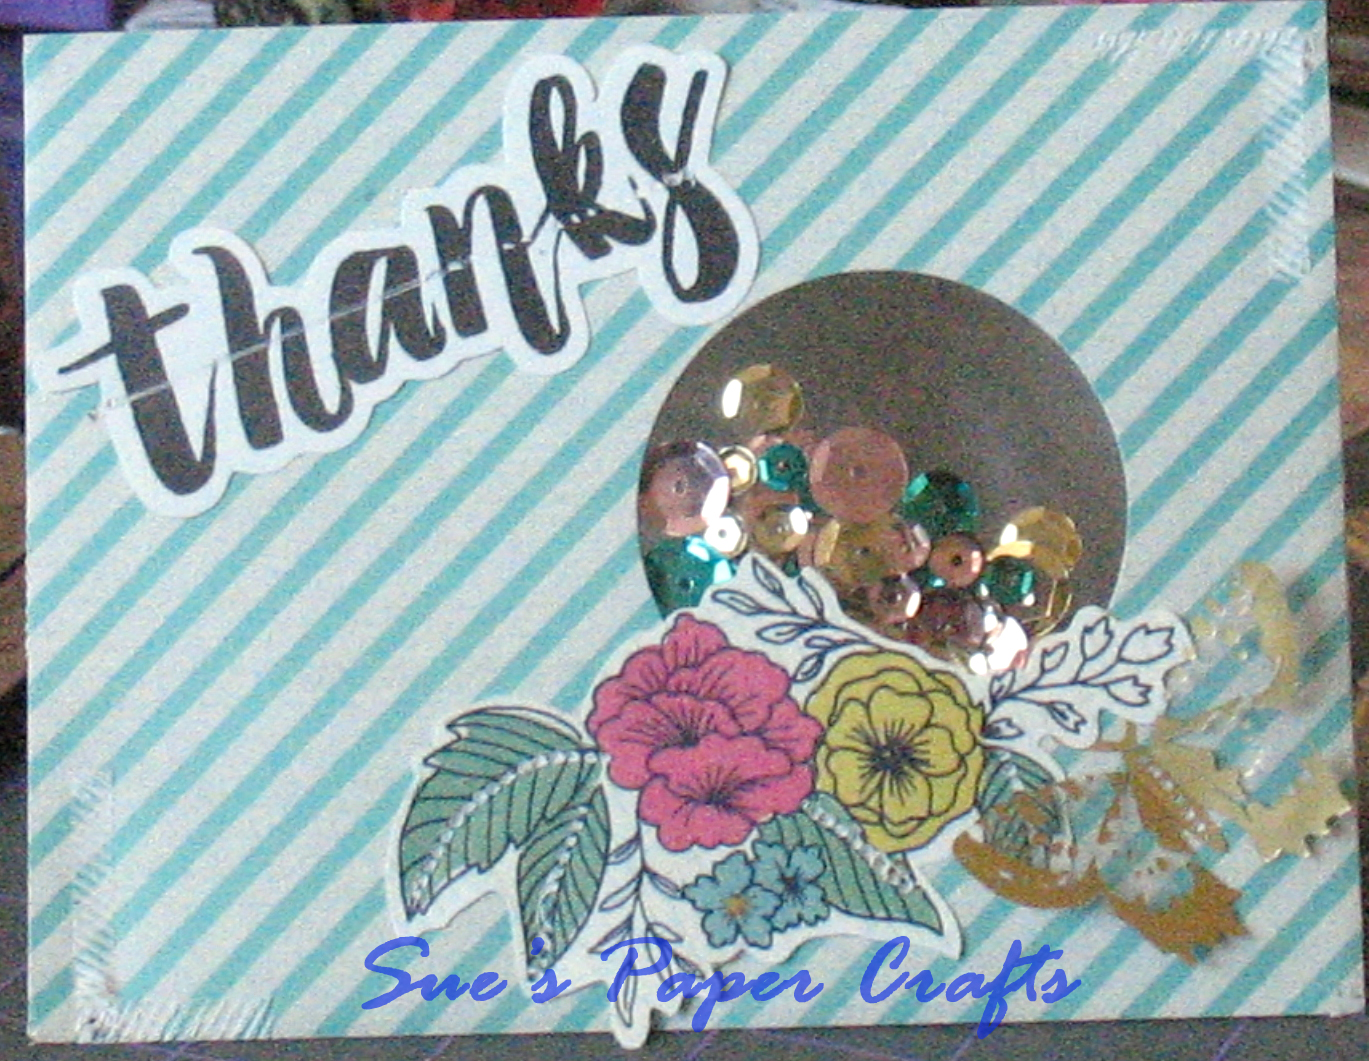
Showing posts with label Shaker Card. Show all posts
Wednesday, November 27, 2019
Friday, March 8, 2019
Shake It Up Blog Hop
Thank you for joining us for
the SHAKE IT UP BLOG HOP
This is a blog hop featuring projects with parts that either move or shake!
You should have arrived from Holli's Blog but if you didn't head over to
Connie Can Crop , she is the beginning of this interactive hop!
This is a one day blog hop, but you have until Sunday at 10pm to finish hopping and leaving your love for all of these talented crafters.
We have three awesome sponsors for this hop!!
Action Wobbles is giving away a 13 pack of Wobbles!!
AND
Simply Stamping with Narelle is giving away this adorable stamp set...Bella & Friends
AND
Wendy Bellino is giving away Two (2) Club Scrap page formulas. Each includes thirteen PAGE FORMULAS with cutting instructions (12x12 scrapbook format). Delivered as printable .pdf files.
What do you need to do to win? Easy... become a follower of each of the fabulous blogs in this hop and leave each of them a comment letting them know what you like best about their projects. Free Shipping to our USA friends but Worldwide will be asked to pay shipping if they win.
You will have until 10 pm Sunday to finish the hop and leave your comments on every blog to be eligible to win.
Winners will be announced on Wednesday 3/13/19 at Connie Can Crop.
I made the shaker card first. The, "Celebrate" die is from Spellbinder's. I got it as part of a grab bag type purchase a while back.
I cut the die out 7 times using 110 pound card stock and one out of a color to match your card. 6 of the die cuts got a severe trimming. All I wanted to use from those layers was the dotted line and outter frame areas, everything else got trimmed out. Then I layered 6 of the die cuts and glued one layer to the next letting dry in between layers. This will give you 3 different shaker areas.
After the layers were totally dry I adhered them to the printed layer (which came from Connie's Crafty Cart) and let it dry. Choose your shaker element colors (I used very samll seed beads) and pour them into the shaker area you want it in.
Glue the last layer of 110 pound (the one you don't trim down) to the matching die cut and let dry. Cut a piece of clear plastic to fit the die cut and glue into place.
I added a ribbon and a few sequins to the shaker box.
Then I made this card in a box for my great-nephew who share's Connie's birthday.
His mom said that he liked these duck things so I used a few ducks to decorate the card. It's his first birthday so I had to include some "1's".
There are 3 kids in the family so I wrote each one's name on each duck. I used my Cricut to write the names.
Here's our line up in case you get lost along the way.
Connie
Rebecca B.
Amanda
AudRey
Alicia
EK
Shannon
Kim
Cindy
Sarah
Julia
Nikki
Holli
Sue K.
Jearise
Veronica
Miranda
Sue N.
Narelle
Wendy
Rebecca B.
Amanda
AudRey
Alicia
EK
Shannon
Kim
Cindy
Sarah
Nikki
Sue K.
Jearise
Veronica
Miranda
Narelle
Happy Birthday, CONNIE!!!!
Be sure to join us next month for our
Rain Rain Go Away Themed Blog hop!
Friday, May 6, 2016
Cousin Elmer Shaker Notecard
When I spotted this file it made me giggle so I decided to play with it.
Thank you for stopping by to take a look.
Sue
You can find this cute little guy here: Ewe-N-Me Printables. You get 1 Seed Packet Envelope per page and you can print up as many as you want to.
I used my We R Memory Keepers Fuse Tool to create a shaker card. After cutting my card base I cut out Cousin Elmer's picture and sized my shaker sleeve to fit the image. I didn't take any pictures of my work with the Fuse but all I used it for was to seal up the edges of the sleeve.
Elmer's image is inside the sleeve along with some seed beads for shake. I also added a ladybug brad to Elmer's hat.
The entire sealed shaker sleeve is glued to the front of the card base. I added some jewels and my note card was complete.
Thank you for stopping by to take a look.
Sue
Saturday, March 26, 2016
New Toy
Despite this horrid cold or whatever it is that I have going on now I had fun playing with my newest toy: A We R Memory Keepers Fuse tool that arrived yesterday. I got it from HSN and it came with a huge accessory kit, extra tips, 2 rulers, shaker cards, cards, sleeves, etc. Everything that I used to make this card came in the accessory kit.
This is a fun little toy to play with and it didn't take me very long to make this card and I would have made more if this cold wasn't sticking with me for so darned long.
It is a VERY blustery day here today and there is sand in the air, lots of sand so I had to take the picture inside and it doesn't sparkle in the picture like it does in person.
Thanks for stopping by to take a look.
Sue
Wednesday, October 21, 2015
Bat Shaker Card
The other day I won a facebook giveaway from Fleurette Bloom Designs for their Halloween Card SVG file. There are 3 different card designs and an envelope that fits all of the cards. I decided to make the bat card first and did a few changes to make it my own including a shaker component.
The star buttons are from Plum Purdy, I painted them a dark purple then added some Craft Twinkles and added a piece of twine to the fold.
Saturday, September 19, 2015
HIMCR #217 - Freestyle
The giveaway is $12 Gift Certificate to A Day for Daisies!
I was coloring this image last night when my granddaughter called to tell me that she had been in a horrid accident. Thank goodness that she only suffered an injury to her arm, I think it is a burn from the airbag going off. Not pretty to look at, neither is her car it is totaled. She did learn a valuable lesson, don't drive with bald tires especially in the rain, it is just too bad that it took her spinning out, flying through the air and rolling over before she learned.
Anyhow....back to the project. I used one of the current freebies being offered by A Day For Daisies and colored it with chalks. Then I cut out a shadow box with my Cameo, added some sequins where the fireflies are flying and a computer generated sentiment. After assembling the box I added some ribbon to two corners and a 5" x 5" card base.
I used sequins, micro beads, mini beads and clear heart confetti for the shaker element.
Saturday, July 4, 2015
HIMCR #206 - Red White & Blue With a Twist
HIMCR #206 - Red, White, & Blue with a Twist! (July 4th)
Make it Christmas in July!
The sponsor is Scrapper's Delights!
Red and white paper is from Craft Smith. I colored my image using red and blue colored pencils, added the sentiment and stamped some snowflakes. I used blue and white beads and blue sequins in my shaker element.
I also added some navy rick rack and white snowflakes.
Saturday, June 6, 2015
HIMCR #202 - Summer Colors
HIMCR #202 - Summer Colors! (June 6th)
The sponsor is Sami Stamps!
The giveaway is a $12 Gift Certificate to Sami Stamps!
In my mind nothing can beat the clear blue summer skies especially here in Arizona where the skies are totally clear, we can go for days without seeing a single cloud.
I thought this bubble fairy was really cute and blue fairies are the best. I printed her then colored her with colored pencils and added some Accent Essentials to the bubble, "highlight" areas and to her wings then I sprinkled some blue glitter on her wings. I also added some blue and white stickles to fill in some of the area between the bubbles. Here is a bit closer look at the shaker that I filled with blue and white beads plus a few blue and silver sequins.
After making the shaker element I cut a piece of watercolor paper to fit my pre-made card base. I colored the paper with my eBrush then used a damp paint brush to spread the color around then I added some circles using a stamp from My Creative Time with blue ink.
After wrapping a ribbon around the folded edge I added a crystal flower and some silver sequins.
Friday, May 1, 2015
2 More Mother's Day Cards
This file is so cute, that I just had to play with it and for a change, I didn't do an invitation to tea.
You can find this file here. You get 2 tea bag envelopes per page and you can print as many as you need.
I made 2 different but kind of the same cards.
The papers are all from DCWV. I cut the card, clipped the corners and added a piece of yellow ribbon to the fold side. The scalloped circle is a Spellbinder's die, I put the envelope on top of the circle. The envelope if perfect for slipping in a sample of your favorite tea to share with the recipient.
I decided to make this one a shaker card so I cut out the front part of the envelope and put the rest aside to use another day.
I put a couple of layers (scraps) under the shaker element and added a hat from plumpurdy.com which I stamped onto watercolor paper using StazOn ink. I colored it with watercolor pencils and did a fussy cut, adding it to the corner of the shaker element. To be honest, the hat was an after thought, I had been doing some experimenting and it was one of my useable experiments and still sitting in my work area.
I managed to use all scraps for both cards, but my scrap pile doesn't seem to have gone down very much. All of the papers are from DCWV's, "Flower Shower Spring Stack".
Thank you for stopping by to take a look.
Friday, April 3, 2015
Gift box with matching card
I love chickens so when I saw this printable I just had to have it, one of these days I would like to have a few chickens of my own. Link to printable
I used the same papers on the card but added a piece of read to break up the checkerboard paper. Wrapped the same ribbons around the checkerboard and lower part of the red layer, I used foam tape to adhere the layers to the card face with some extra foam tape under the shaker portion. I used clear beads and red sequins to the shaker element. And added a piece of red twine to the folded edge.
You get 7 images on the sheet, 3 of the larger image and 4 of the smaller one. I used two of the bigger images on the box and 1 of the smaller images on the card.
I made this cute gift box and matching card. The box is cut using my Cricut and Tags, Bags, Boxes and More 2 cartridge. The papers were printed with my Imagine. I used my Cuttlebug Alphabet Dies to cut the, "Hello Spring".
After cutting the box out I added the checkerboard paper then wrapped a black and white stripped ribbon then topped that ribbon with red ribbon. I added red and black twine at the top and tied it into a bow. I adhered the images using foam pads.
Sunday, March 1, 2015
The 12 Months of Christmas - Challenge #3
Hi and welcome to The 12 Months of Christmas Challenge #3.
Here is what I came up with for our theme of, "Snow".
I wanted to make a shaker card, this image was perfect for that. When I shake the card it snows inside the window.
Here is what I came up with for our theme of, "Snow".
Ever since our move to Arizona the memory of winter's wrath has faded. We do get some snow on occasion, over New Year's weekend we had 6" of the white stuff fall on us. We stayed home for 2 days, that's how long it took for the snow to melt.
I wanted to make a shaker card, this image was perfect for that. When I shake the card it snows inside the window.
I used this month's paper, I embossed that using my Cuttlebug and snow embossing folder.
The sentiment is from: DDDoodles_HH_WordArt\DDDoodles_HH_WordArt
I added a piece of rick rack on one side of the snow layer and rounded off the corners of the card face.
I used mini beads inside the shaker element.
Challenge #3 Summary:
- Challenge Link Up: March 1st – March 31st
- Challenge START posts go live with the Sleigh Belles at 6:00 P.M. EDT (18:00 hours) on Sunday, March 1st
- Challenge MIDWAY posts go live with the Merry Maidens at 6:00 P.M. EDT (18:00 hours) on Sunday, March 15th
- Guest Sponsor: Scribbles Designs (http://buyscribblesdesigns.
blogspot.ca/) - Main blog address: http://
12monthsofchristmaslinkup. blogspot.ca/ - Optional Theme for Participants: Let it Snow, Let it Snow, Let it Snow!
- Description that will appear on main blog for participants: The snow may be melting, but there are still signs of winter. Soon Spring will be upon us. Let's capture winter this month by including a little snow on our cards. So for a chance to win extra prizes, Let it Snow, Let it Snow, Let it Snow all over your cards!
In order to have a chance to win the prize from our wonderful guest sponsor this month, make sure that your card has some snow in some form or other on it. If you do follow the optional theme, be sure to add FT after your name so that we include you in the draw for the prize.
Remember, you don't need to follow the theme to link up your cards and earn this month's free digital paper, and have your name thrown into the year end draw for some extra digital goodies. You only need to follow the theme if you want a chance to win this month's sponsored prize of a $10.00 gift certificate from Scribbles Designs.
Wednesday, February 25, 2015
Ewe-N-Me Printables Shamrock Shaker Cards
I did each one a bit different, if you have never made a shaker card before, click here for a you tube video.
For the first card I cut my card base to measure: 4 1/4" wide x 5 1/2" tall. I cut the green layer a 1/2" smaller all the way around and added a piece of washi tape.
My shaker element measures 2 3/4" wide x 3 1/4" high, this is the size the hang tags are when you cut them out. I used some shamrock confetti that I have had for several years inside the shaker. I added a piece of green and white twine to the fold.
My second card measures 5 1/2" wide x 6" tall, I cut 3 chevrons using 3 different green scraps and embossed them using a shamrock embossing folder I made myself, I also wrapped a piece of green ribbon around the chevrons. I added a piece of green and white twine to the fold.
Card 3 measures 5" wide x 6" tall, the lighter green layer measures 3 3/4" wide x 5" tall, I also embossed this with my shamrock embossing folder, added a piece of green ribbon and a few sequins.
Saturday, January 31, 2015
HIMCR #185 - Freestyle
This little bunny told me that he wanted to be a shaker card so I made him into one.
Recipe:
Image from Digi Digi Doodle
Cardstock
Clear Acetate
Washi Tape
Colored Pencils
Sequins, beads, whatever for your shaker
Chipboard (I used an old cereal box)
Spellbinders circle and scalloped circle dies
I printed and colored my image with colored pencils. I cut him out with one of the circle dies. For the shaker component I cut a few layers of chipboard out using 2 circle dies at the same time so that the center would be cut out.
Cut the acetate for the window and a circle inside a circle to make the top part of the frame. Glue the chipboard layers together and let dry thoroughly. Attach chipboard layers to the image layer with strong glue. Add the sequins, beads, etc. then attach the window with strong glue placing the frame on top. Then attach to scalloped circle on bottom and adhere to card face.
I added a piece of washi tape and some sequins.
Recipe:
Image from Digi Digi Doodle
Cardstock
Clear Acetate
Washi Tape
Colored Pencils
Sequins, beads, whatever for your shaker
Chipboard (I used an old cereal box)
Spellbinders circle and scalloped circle dies
I printed and colored my image with colored pencils. I cut him out with one of the circle dies. For the shaker component I cut a few layers of chipboard out using 2 circle dies at the same time so that the center would be cut out.
Cut the acetate for the window and a circle inside a circle to make the top part of the frame. Glue the chipboard layers together and let dry thoroughly. Attach chipboard layers to the image layer with strong glue. Add the sequins, beads, etc. then attach the window with strong glue placing the frame on top. Then attach to scalloped circle on bottom and adhere to card face.
I added a piece of washi tape and some sequins.
Thursday, January 1, 2015
12 Months of Christmas - Challenge 1 Start DT Sue
Today starts a brand new blog and I have been honored to have been chosen to be a part of their first Design Team.
This month's theme is Father Time. I used the, "Matter of Time" papers from:
Challenge Link Up: January 1st – January 31st
Challenge START posts go live at 6:00 P.M. EDT on Thursday, January 1st
Challenge MIDWAY posts go live at 6:00 P.M. EDT on Thursday, January 15th
Guest Sponsor: Limited Runs http://limitedrunsstamps. blogspot.ca/
Main blog address: http:// 12monthsofchristmaslinkup. blogspot.ca/
Optional Theme for Participants: Father Time
Description for participants: A new year means starting the clock over. A TIME for new beginnings. TIME to make all those Christmas Cards you will need in December. So don't put away your holiday stash quite yet, it is TIME to start The 12 Months of Christmas Link Up. In order to have a chance to win the prize from our wonderful guest sponsor this month, Limited Runs, make sure that your card has something time related on it. If you do follow the optional theme, be sure to add FT after your name so that we include you in the draw for the prize. Remember, you don't need to follow the theme to link up your cards and earn a free paper each month, and have your name thrown into the year end draw for some extra digital goodies. You only need to follow the theme if you want a chance to win this month's sponsored prize of a $10.00 gift certificate from Limited Runs.
This month's theme is Father Time. I used the, "Matter of Time" papers from:
Along with the image: Snowglobes - 4 from http://limitedrunsstamps. blogspot.ca/
I wanted this image so that I would have a reason to make a shaker card. I have come up with a slightly different way to form my shaker, instead of using 2 layers of foam tape I cut 4 or 5 layers of chipboard, usually an empty cereal box. I glue the layers together, add some weight to the top of the pile and let them dry for a couple of hours before adding the clear acetate and frame.
I used my Spellbinders circle dies to cut the shaker layers, and frame by using two different sized circles at the same time forming a thin circle for the base and frame. I used the bigger of the 2 circles to cut out the clear acetate.
After printing the Snowglobe - 4 image from Limited Runs I colored it using colored pencils. I also cut a very thin piece of chipboard and attached it to the back of the colored image to add a bit of stiffness and more support for the shaker feature. I also used some small silver sequins as falling snow. I used micro beads for the shaker snow. Please make sure that the glue used on the sequins is totally dry before adding the micro beads. AFTER adding the beads, use some very strong glue to add the clear acetate layer then add the frame, add some weight to the stack and allow to dry. Finish decorating the rest of your shaker to your liking.
Attach to your card face, add the, "A Matter of Time" layer, finished shaker, twine and sentiment to the card. I printed my sentiment with my printer onto some cream colored cardstock, inked the edges of my papers and layers.
Here is everything you need to know to take part in the challenge:
Challenge Link Up: January 1st – January 31st
Subscribe to:
Posts (Atom)